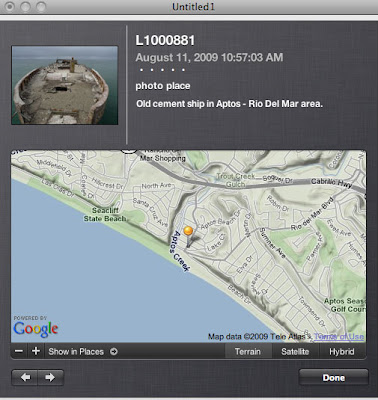
 This post will cover my first experiences with the Eye-Fi geo-tagging feature and its integration with Apples iPhoto software. In my last post I described the installation and how the wi-fi feature worked. Now its onto why I purchased this product the ability to tag my pictures with the location they were taken at. I'm including several screen shots of the info as it is displayed in iPhoto. (Please click on the photos to see them full size.)
What I noticed when taking pictures with the geo tagging turned on was it took longer for the memory card to store all the information. I had to remember that the cameras buffer would fill much faster than I was used to. This may be a inconvenience if you are taking shots in burst mode. Having said that the rest of the picture taking process was uneventful.
After uploading the pictures I found as promised the location info was there. You can see in the extended photo data that the latitude and longitude are automatically captured. (Hint one thing to remember before uploading your pictures open the eye-fi manager software and have it connected to the internet to process the geo-tagging information.)
In iPhoto you will have to select each picture individually and the get info menu to map your picture. Once you click on the map it button the map should show up as shown below.
 You can add a photo description as I have in this example. What I did next was to select the arrow button in the lower left corner of the picture to go to the next photo. This makes mapping the pictures go faster. You now can upload these pictures to any website that supports geo-tagging and you are done.


No comments:
Post a Comment