Sunday, December 27, 2009

Horse: color to black & white

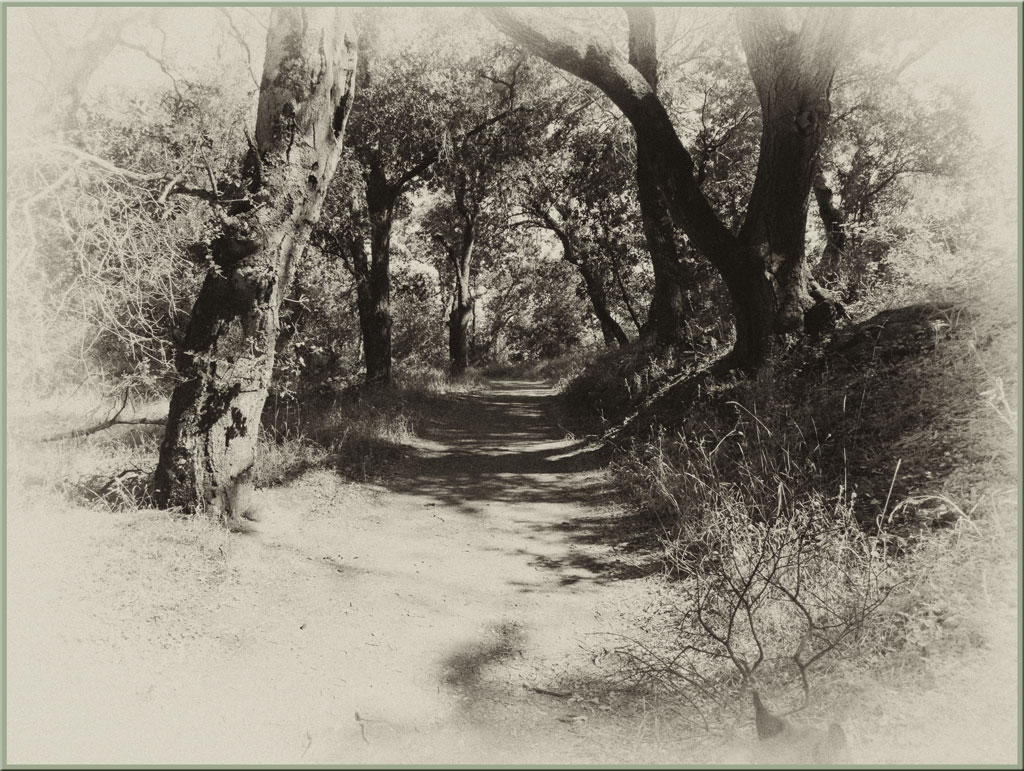
I'm still having fun taking color photographs and converting them to black and white. The process shows what a different statement the picture makes. Today I'm featuring a photo I took the other day of a horse that we visit regularly.
In the color version you see the interesting coat color with its interesting tones and subtle color changes. The photo was processed in Adobe Lightroom 3.0 Beta which is a free download from Adobe. You can try and use this version until the final version is released.

In the black and white version you are more drawn to the eye and the pattern of spots in his coat along with the soft black on his nose. The biggest difference so me is the strong contrast that make the spots in his coat jump out at you. Each of the photographs make their own statement and that is what has intrigued me with the process  The photo was transformed to black and white using Silver Efex Pro.
I have a suggestion of another blog that I read regularly Steve Huff is a professional photographer who not only takes wonderful pictures but does testing on the latest Leica, Nikon, Cannon cameras and accessories. Take a look and you will go back on a regular basis to see whats new and how to use it.

Saturday, December 19, 2009

HDR Photography

High Dynamic Range is one of the new selections available in the latest firmware update. Today I'm sharing a few of the pictures I took using this selection available in the scene mode. You have three choices Natural, Art and Black and White. I chose the art and black and white. No other filters were used the photos where processed in Adobe Lighroom 2.6.
Unfortunately while using this mode you can only save the photographs in jpg and not raw. Still I think that you get some very usable pictures especially for use on the web. The photo to the right brought out all the strong colors and sharpness.


Horses and Pasture highlighted by strong colors.


Black and White HDR shows strong contrast.


Excellent color and tonality.
Here now is a short video showing some more of the pictures taken in HDR.

Sunday, December 13, 2009

New Firmware

Leica has announced the availability of a new firmware update. This link will take you to the page that will allow you to download the software, pdf instructions and the pdf description of all the new and updated functions.
Highlights include 1 to 1 aspect ratio, white balance enhancements, exposure compensation, lens resume, red eye removal, message display and user name record. I have just updated my camera and will discuss these additions in a later blog.
Today I'm sharing some crops and macro shots that I took on Friday and Saturday. The first shot is a crop of a mushroom hidden among the garden plants.

The next two pictures are a close up of the center of a orchid. Scary looking and beautiful all at the same time. The color rendition shows the color changes that occur as the flower nears the end of its life cycle.

The black and white version of the photograph was done in a antique style that has a softness to it and does not show the ravages of fleeting life.

Just for fun I'm adding this high resolution photograph of a lone leaf with rain drops on it. Mouse click on the (+) in the upper right corner to see it full screen. If the image does not appear click the center button just to the left of the (+) button.

Sunday, December 6, 2009

Holiday Season

Today we put up our tree and ornaments. This made think what type of pictures could I take and share with you.  Well as you can see I used a Christmas ornament as a model and then played with the image a little.

The color version has strong details and warm colors around the eyes and nose.

The black and white close up shows the same contrasts with some stronger details. Enjoy the holidays and have fun taking pictures.

Friday, November 27, 2009

More B & W

More black and white images showing the wide variety of looks you can get from this format.

Water droplets on a leaf.

Debris on a beach.

A smile on his face.

Thursday, November 19, 2009

Black and White

I thought I would share a few pictures that I converted from color to black and white using Silver Efex Pro and Topaz Labs plug in filters in Adobe Lightroom 2.5. First I have to say that the videos that you can see and use to learn how to best use Silver Efex Pro in Adobe Lightroom are very helpful. They explain the tools, interface and how to use them. They also explain how to apply old darkroom effects to your pictures.
I thought it might be helpful to see my results as a first time user and maybe to spark your interest in trying some of the techniques provided by these specialized filters. You can try these filters for free and they are worth the look. You might just enjoy using them.

This picture I cropped from a larger photo then applied the Efex Pro filter and adjusted the brightness, contrast and structure. I then used the topaz filter to smooth out the details before applying light to the lower right side of the picture.

This picture I used a preset filter in Efex Pro and smoothed out some of the detail the Topaz Labs filter.

A Sunday morning add on. I just thought that this black and white picture which has been processed to give it a look of antique solarization.

This picture was processed with Adobe Lightroom 2 and Silver Efexpro Filters. It took a rather plain photograph that I had rated as 2 stars and transformed it into a interesting 4 star picture.

Tuesday, November 10, 2009

Birthday Fun

The family went out to dinner on Saturday night to celebrate 1 October and 2 November birthdays. We sat outside on a partially lite patio with the outdoor heaters blazing away. I took several pictures and posted them in my web album and if your interested please feel free to take a look.
Here today I'm going to feature some of those pictures that I have played with using Adobe Photo Shop Elements 8 and Topaz Labs filters. The first picture is cropped from a larger image of my grandson either trying to eat, bite or stick the balloon up his nose. It was adjusted using Topaz Labs filters to make the picture more dramatic.

Now I did say it was dark outside and here you see my youngest grandson trying to climb over the railing to get a better view of the pool below. This picture was adjusted in Photo Shop Elements using the Stylize filter.

This picture is of my lovely daughter in law and was first cropped and then adjusted using Topaz Filters to give the picture a smooth look while still keeping the essential details of the picture.

This last picture of me my son and two grandsons was adjusted with Adobe Photo Shop Elements using the Colored Pencil Filter. I hope this has encouraged you to play a little with your pictures.

Saturday, October 31, 2009

Macro Focus Mode

I thought that I would share some photos I took recently using the Macro Focus Mode on the Leica D-Lux 4. For those of you that may not be familiar with the three focus settings available on this camera they are. Auto Focus used most of the time, Manual Focus used for difficult focusing situations and Macro Focus for close up images.
The picture to the right is that of a rose with water drops and as you can see the water is clear as are the other details on the flower. Click on the image to see a larger version.
I'm embedding a short video of shots that I took and more detailed photos below showing not only traditional macro but also some unusual shoots of statues.


For larger picture see below:

Water on Leaf excellent detail and colors.

Statue taken at about 5 feet shows good detail.

Rose with water drops and highlighted by the pavers in the background.

Lovely color taken F2.o at 18 inches.

Leaf, rocks and moss show enhanced detail after processing with Topaz Labs filter.

Saturday, October 24, 2009

Framing

Framing what is it and how can I use it? I think of it as a element that adds definition and focus to your photograph. The example below is of a landscape I took recently and I used the metal fence to pull your eye into the picture.

In the next picture I used the tree and the branches to draw ones attention to the pasture and scenery beyond. Note the darkness of the tree and its branches in the foreground highlight the colors in the picture.

In the picture of the leaf and it's shadow the leaf is framed by the line in the concrete and the change of texture and color in the background. The shadow cast by the leaf adds interest and depth to the picture.

Saturday, October 17, 2009

Special Find

Just another lovely day in the valley and while taking the dogs for their daily walk what did I see? I could hardly believe my eyes when I saw this lovely 1967 Ford Shelby Cobra sitting out for all to see. No not a replica but the real thing with California Historic plates and all.
I was glad to reach into my shorts pocket and pull out my camera and took a few quick shots. The sun was really bright and the car was sparkling making for less then ideal conditions to get really great pictures. I think these turned out well and I hope you enjoy looking at them.


If you would like to see the picture full size just click here!

Friday, October 16, 2009

No it is not a Leica

But considering that the other camera I love to use is my Nikon D300 I just had to share this video produced with the just announced Nikon D3s. It shoots video and still images in near total darkness. The first portion of the video demonstrates these capabilities and wow it is impressive. Check it out for yourself ! I suggest clicking on the full screen mode and just sitting back and enjoying this short demo .


Low light specifications capable of delivering low-noise 12,800 ISO still shooting at up to 9-fps, with 24-fps cinema-quality HD video. The price well it is $5,200.00 U.S. for the body only.

Saturday, October 10, 2009

Lets play

This week I thought I might have a little fun with some images I took recently. I have been experimenting with Topaz filters a plug-in that works in Adobe Photo Shop and Adobe Photo Shop Elements. The idea was to see if they really could make my pictures pop.

I really had fun with this picture of my grandson who was getting ready to watch a Barney video. By using the filters adjust, simplify 2 and detail the picture really jumps out at you.

Early morning sky enhanced with the adjust filter to bring out the pink from the sun just coming up over the horizon.

Nothing goes to waste, what is left of a fallen deer in the Windy Hill Preserve. Picture was adjusted with the detail filter.

Looking down at the creek adjusted with detail filter.

Just for laughs a hose growing out of the trunk of a tree.

Friday, October 2, 2009

Like Your Eye

I found this short video on why Leica range finder cameras have such a strong following by artistic photographers. The M-8 is featured in this video and the full frame M-9 hopefully will be available soon.

Friday, September 25, 2009

New Leica Cameras Announced

Just this month Leica announced three new cameras the S-2, M-9 and the X-1. Here is a video courtesy of B & H Photo of the New York City announcement with Seal and the CEO of Leica cameras.

Thursday, September 17, 2009

Interesting Video

DW-TV of Germany put out this interesting story about Leica Camera and I thought that you might be interested in seeing it. The video shows where the company is headed and some of the upper end equipment they offer. The photographs they use and the photographers are all top notch. Sit back and enjoy.

Friday, September 11, 2009

Custom Mode

Today I was out in nature and decided to try the custom mode setting. This would allow me to use the enhanced zoom setting at a higher that the normal 3 meg limit. I would have to say that it was a success as I was able to get some pictures of wild turkeys that while using the normal setting would be to small.
I'm also adding some pictures of the settings setup I used on the camera. Of course there are a few more turkey shots to illustrate the difference between normal mode and custom with telephoto mode.

This first picture is of the mode selector nob in the Custom 1 position.


This shows the menu and the two selections I made: Number one was picture size 10m and number two Digital Zoom On. Which is found on the third menu page. Use the selector toggle to maneuver through the menus.

Turkeys taken without the use of digital zoom.

Turkeys taken with digital zoom.

Digital Zoom used to capture the top of Windy Hill 2+ miles away.

Just had to add this bird captured with the normal zoom. Good luck experimenting with your cameras!

Saturday, September 5, 2009

Holiday Weekend

It is labor day weekend so I thought that I would share a few pictures taken today. The first picture highlights depth of field. You may have to click on the picture to see it in a larger mode.
What you see is that the unopened flower in the lower left corner is slightly blurred. As you move up into the picture the unopened flower in the middle right has a soft focus. Now look at the unopened flower in the upper left corner and see a perfectly sharpen image.
This picture was taken with the following settings in Aperture Mode: A:f2.8 / S:100 at focal length 5.1. If you wanted uniform sharpness you would have to raise the aperture settings to a higher number.

In this picture you see a close up of some lovely flowers that have been slightly softened in Adobe Photo Shop Elements. I used the dry bush filter and the effect is lovely and in keeping with the filtered light.

This picture is of a large tree blossom and a bee looking for a meal. Again I used Adobe Photo Shop Elements to process the image. I adjusted the contrast to highlight the subtle color changes is the leaves.
I hope that you all have a nice holiday and take a lot of pictures!

Saturday, August 29, 2009

Video Mode Demo

In this installment I'm sharing a video that I put together just to demonstrate the video quality available to you with the Leica D-Lux 4.
The first clip was shot in 640 x 480 in filtered light with unaltered sound and video. The sound from the carousel ride is clear the picture is clear and the colors true.
Clip number two was taken in 1280 x 720 HD 16 x 9, you will note that you can hear the wind and audio was added for effect. No video enhancements, note the clarity of this clip and richness of the colors.
Clip number three was shot indoors and the light source was from ambient light coming through the windows. The video is sharp, true to color and the sound coming from the television is clear. No enhancements were done to this clip.

from Ted Goth on Vimeo.

My over all impression is that for a small compact camera the Leica succeeds in providing good quality video ranging from QVGA - WVGA - VGA and HD. It is not a replacement for a good high definition video camera but it certainly works well for impromptu videos and times you don't want to deal with a larger HD video camera. Note the picture in this post was also taken with the Leica set at ISO 80, speed 400 and aperture f3.5.

Friday, August 21, 2009

More Eye-Fi

Today I'm going to talk to you a little about how the Eye-Fi Geo integrates with iPhoto and share some tricks to speed up the process. First I want to mention the settings portion of the Eye-Fi Manager, getting this right the first time will help make the geo-tagging experience painless. If you need to see the accompanying pictures larger just click on the image.

This first picture is of the Eye-Fi settings menu be sure to chose iPhoto from the photo destinations menu or Eye-Fi will place your photo's in a separate folder instead of automatically importing them into iPhoto. Now go to the GeoTagging selection and turn geo-tagging on. I found that this takes a while before it initializes and turns on the tagging on your card. Once on it works well every time.

After you have successfully uploaded your photo's you will be able to go to the Eye-Fi Manager anytime and see photo's that you have uploaded and if they have geo tagging information associated with them. The manager saves thumbnails of your pictures and makes for fast reviewing.

iPhoto hints begin here by using the shift - apple command combo you can select a number of out of order pictures to work with. Just hold down the shift key and apple command key while selecting the pictures you want to work with your mouse. The reason i mention this is that several of the pictures may have been taken in the same location and you can map them all at the same time instead of one at a time.


As above you can all so select pictures in a contiguous manner by selecting the first photo and then holding down the shift key while clicking on the last picture you want to select. Now right mouse click on Get-Info from the menu - you can also use the drop down menu by clicking on photo and choosing Get-info this will bring up the next picture.

Mouse click on photo-place and choose map-it. This will then bring up a map like the one below for all of your selected pictures. I also take advantage of adding a generic description to the description box at this time. Just click on description and add in something that is common to all the pictures that you have selected. You will have now tagged all of the selected pictures with the proper information.

Now anytime you choose you can see exactly where your photograph was taken. I hope this helps you decide if geo-tagging is something worthwhile for you........